

After tiling is complete in home renovations, we often consider grout sealing. Firstly, it helps prevent dirt buildup and keeps the grout from turning yellow or black, which affects the aesthetics. Secondly, it protects the tiles, preventing cracks caused by thermal expansion and contraction. Thus, grout sealing is crucial in tile installations. Tiles also reflect our sense of beauty, and their pleasing colors can make our living spaces feel more relaxing.
However, grout sealers come in over 20 different colors, so how do we choose the right one? What should we be aware of during installation? Today, let’s take a broader look at tile grout sealing!
1. Why do tiles need grout sealing?
Initially, tile gaps were filled with white cement. However, over time and under environmental factors, it would quickly get dirty, blackened, and moldy. Then, grout filler came into use, an improved version of white cement, with added quartz powder to increase strength. But it still wasn’t waterproof, especially in kitchens and bathrooms, where yellowing and mold still occurred. This led to the development of grout sealers.
Grout sealer is made of acrylic resin and pigments. Early versions were single-component, reacting with moisture in the air to harden, but they would shrink and produce harmful substances like formaldehyde during the evaporation process. However, single-component sealers had issues like poor stability and easy deformity, leading to their obsolescence.
The current market mainly uses dual-component grout sealers made of epoxy resin and curing agents, also known as ceramic or authentic ceramic adhesives. These components mix during application and harden without shrinkage or harmful emissions. They are durable, waterproof, and easy to clean.
2. Main Features of Grout Sealers
All-in-one solution: Hard as ceramic, waterproof, mold-proof, dirt-resistant, acid and alkali-resistant, aging-resistant, and oil-proof.
Innovative colors: With a modern, luxurious, and elegant appeal, providing a subtle sheen with unique charm.
Easy application: It can be applied using a caulking gun, filling gaps without collapsing, causing no shrinkage, and forming in one go. This makes it perfect for DIY projects and saves costs.
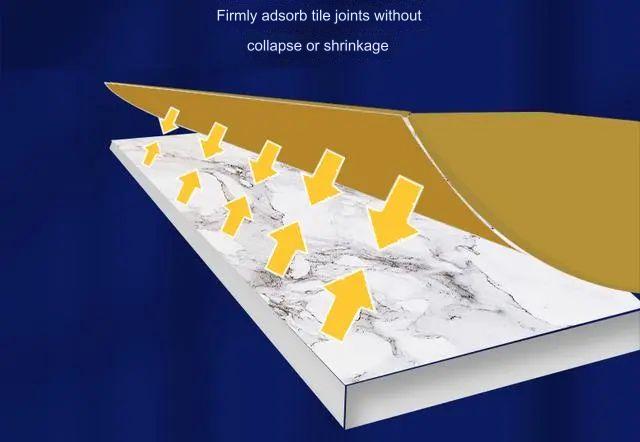
No, dripping on walls: Ensures the design potential and aesthetic appeal are maintained.
High hardness: Matches tile expansion rates, prevents cracking, and resolves issues with the lower hardness and shrinkage of single-component sealers, leading to long-lasting results.
3. How to Choose a Grout Sealer?
Grout sealer comes in many colors, allowing users and contractors to select the best match for their tiles.
Matching tones: If the grout sealer brand offers a color similar to your floor or wall tiles, choose a similar shade for a more uniform, clean look. For close-matching colors, select a slightly lighter sealer to keep the lines from being too obvious.
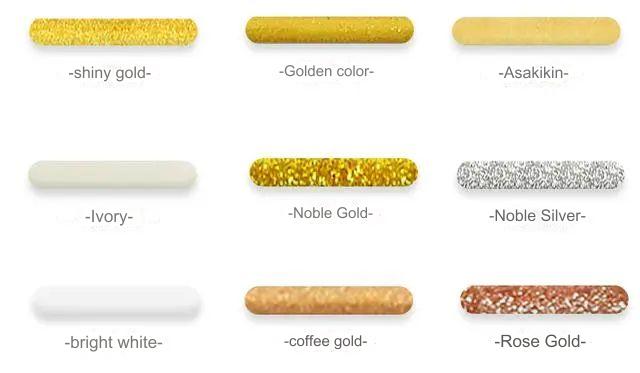
Contrasting colors: If your tiles are unique and you can’t find a close match, you can opt for a contrasting color. Pair the grout color with other elements in the room to maintain a harmonious overall look, even if the grout color stands out from the tile.
4. How to Apply Grout Sealer?
First, attach a special nozzle and fit it onto a quality, labor-saving caulking gun. Before starting, ensure the sealant is well-mixed in the nozzle. Here’s a step-by-step guide:
1. Clean the gaps, ensuring no water or dust is present to prevent peeling after application.
2. Apply masking tape along the edges of the gaps before sealing.
3. Use the caulking gun to apply a consistent layer of sealant. Discard the first 40 cm of material to ensure proper mixing.
4. Apply the sealer along the gaps, keeping the nozzle diameter smaller than the gap width.
5. After sealing, use a round tool to smooth out the sealant and remove the masking tape before the sealer dries. If excess sealer spills, wipe it with alcohol or scrape it off after curing.
6. Leave the sealant to cure for 3-5 hours partially, achieving full curing the next day.
5. Grout Sealer Application Precautions
Although applying grout sealer is simple, many new contractors may encounter issues, so here are some key points to keep in mind:
1. After applying the sealer, if there is bad weather, such as rain or strong winds, close the windows promptly.
2. Wait to step on the sealed area within 6 hours, and do not clean it with wet mops within 24 hours.
3. Ensure the room is dust-free for 24 hours after sealing, and avoid cutting tiles or moving furniture in the sealed area.
4. Keep the space well-ventilated after sealing, and don’t keep windows closed for too long.
5. If sealing is interrupted for over 20 minutes, the material in the mixing tube may begin to cure, so replace the tube if needed.
6. Do not use alcohol or other chemical cleaners to clean tile gaps after sealing.
7. Curing will slow in colder temperatures, so ensure the room temperature is above 10°C. If necessary, use heaters to improve curing conditions.
8. Avoid moisture in gaps near doors and windows, as temperature differences may cause condensation. Use a heat gun to dry the area before sealing.
9. Ensure a dry environment during application, especially in humid climates. If necessary, use air conditioning to remove moisture.
By following these guidelines, your grout sealer application will be smooth, long-lasting, and effective!


